 |
 |
|---|
 |
|---|
Support > Technical Support |
|---|
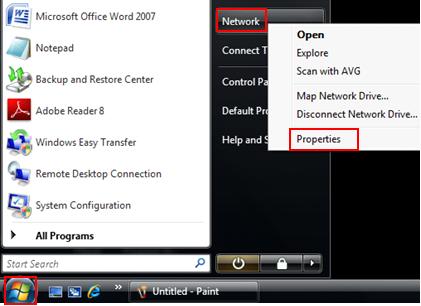
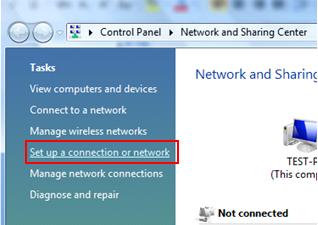
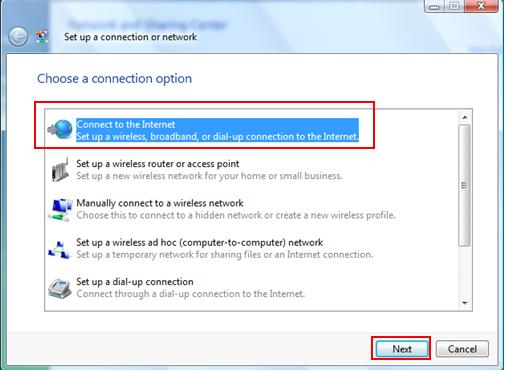
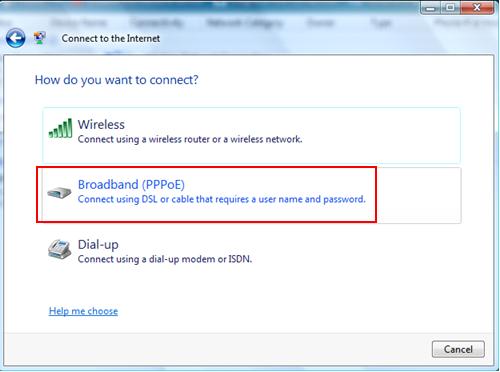
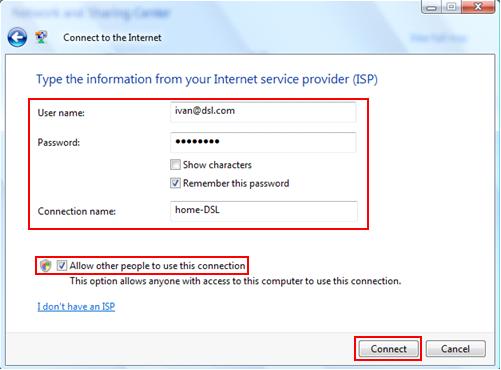
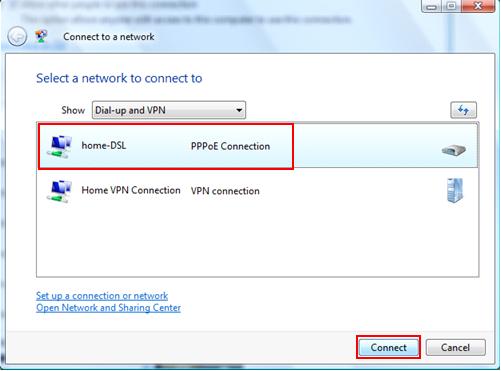
How to Create PPPoe Dialer
For XP
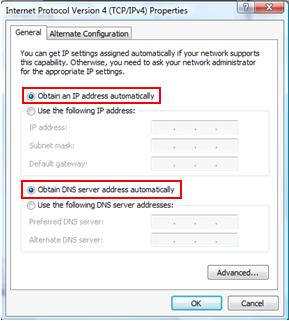
For VistaBefore you start to configure this dialer, configure network card to obtain IP address and DNS server automatically. Ready? Let’s start here:
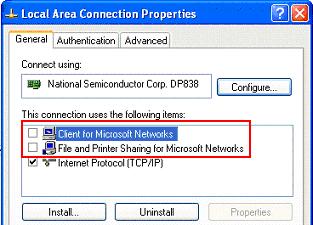
Check Your LAN Enable / Disable
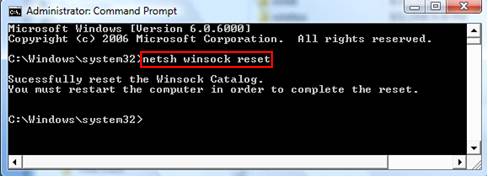
- Open the Windows Control Panel. Control Panel can be found on the Windows Start Menu. Netsh winsock Reset - Resetting Winsock Catalog and Solving Network Problem
netsh winsock reset is useful command that you can use in Microsoft Windows to reset winsock catalog back to default setting or clean state. You can try this if you are having following Internet access or networking problems but still failing to resolve the problem after trying all other suggestions.
Quick Tips to Solve Network Cable is Unplugged Issue
If you see network cable is unplugged error after having a network connection between your computer’s network card and router/switch, then you can try following tips to solve the issue:
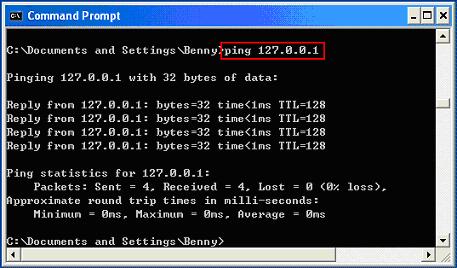
Using Ping to Troubleshoot Network Problem
Sometimes if your network connection is down and you can use ping to troubleshoot network problem and then fix it. Using WinSockFix to Fix Window XP Networking Problem
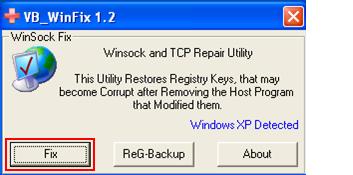
WinSockFix is also known as WinSock XP Fix! This is a popular program that usually used to fix Windows XP networking problem that caused by faulty WinSock or registry. If you encounter the following networking problems, and you have tried all other methods to resolve the problem but failed, then you can give this simple program a try. Internet Connection Sharing- ICS Client Computer Setup
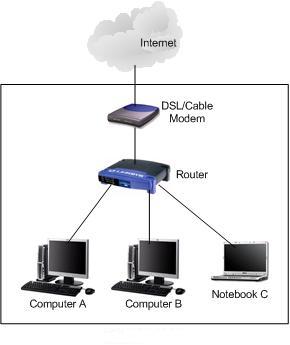
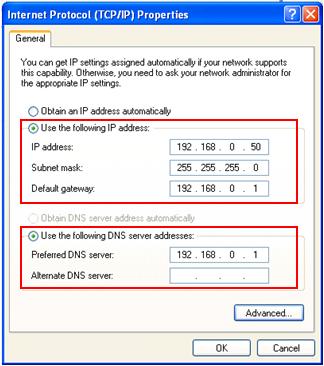
This article will explain how to configure client computer to use ICS (Internet Connection Sharing) to access Internet. There are 3 methods available to configure ICS client computer, which are DHCP setup, manual setup and network setup wizard. DHCP SetupThis is the easiest way to set up client computer. It works on all versions of Windows OS. Manual SetupIf you want to do manual TCP/IP setup on client computers, use this network parameters to set them up. It works… Network Setup WizardHow to monitor and manage your shared Internet connection from a client computer? Internet Connection Sharing-Network Setup Wizard
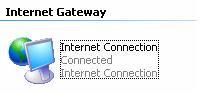
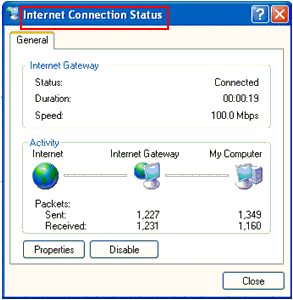
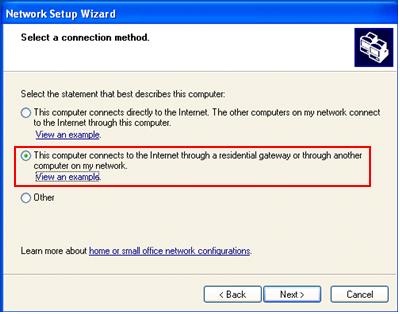
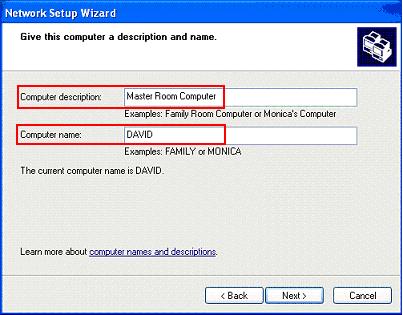
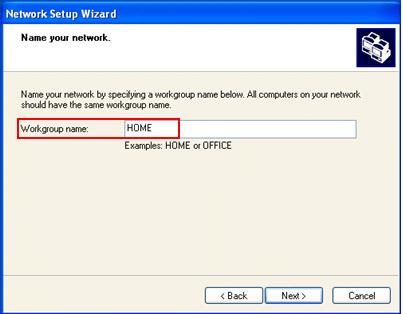
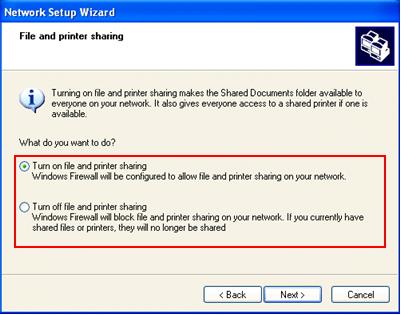
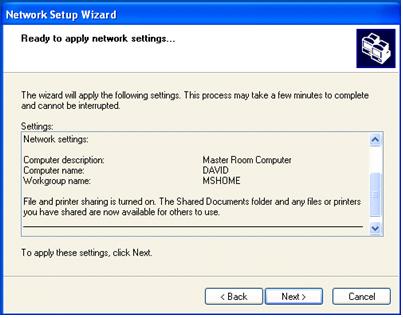
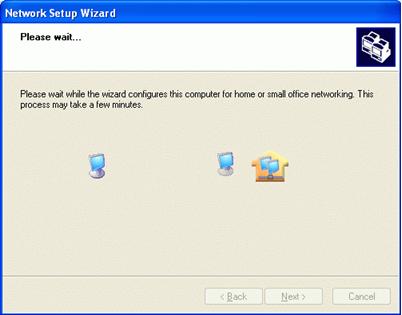
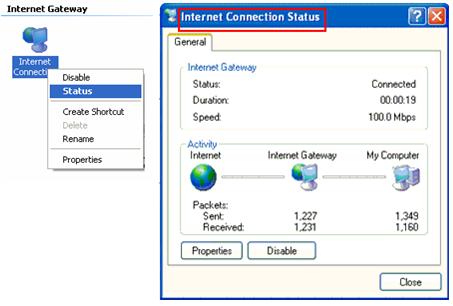
If you use Microsoft Internet Connection Sharing to access the Internet, then you can run Network Setup Wizard to install ICS Discovery and Control to access Internet, monitor and manage your shared Internet connection from a client computer. Here is how it works: The ICS host computer will advertise its shared connection to client computers with a broadcast if ICS is enabled. The ICS control on client computer then detects the broadcast, and an Internet Connection icon for the ICS host computer automatically appears in the network connections folder. This icon will allow ICS clients to remotely monitor and control the shared Internet connection. Running Network Setup WizardThere are 2 ways to run the wizard on client computer with Windows 98, Windows 98 Second Edition, Windows Millennium Edition or Windows XP installed: Network Setup WizardKindly follow step-by-step instructions to configure client computer after launching the wizard. Internet Connection Sharing-Host Computer Setup in WinXP
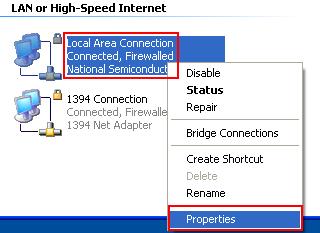
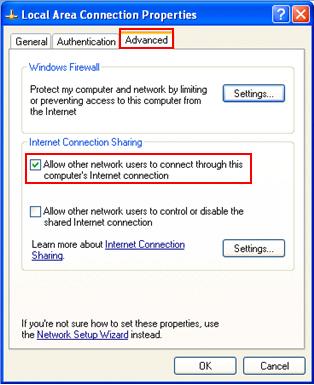
ICS Host Computer Setup in Windows XP! You need to enable Internet Connection Sharing feature on ICS host, so that it can share Internet connection with other computers.
|
 |
|
|---|---|---|


|
||||
|---|---|---|---|---|
Snet Solution Pty Ltd,All Copyrights 2S0N1E0T. |